After you’ve successfully deployed a Hyperlane Warp Route (HWR), you have three out-of-the-box options for setting up a frontend UI to support interchain token transfers:
- Fork, customize, and deploy the Hyperlane Warp UI template
- Use a managed Superbridge instance
- Embed the bridge widget in your existing site — drop a React component or iframe into your app
1. Hyperlane Warp UI Template
The Hyperlane Warp UI template is a prebuilt Next.JS app you can easily customize and deploy.
- Configuration: Follow the configuration instructions for details on how to configure the Warp UI Web application and run it locally.
- Customization: Follow the customization instructions for details on how to configure the UI’s tokens and change the default branding assets/theme.
Registry
By default, the app will use the canonical Hyperlane registry published on NPM. To use a different registry, you can set a URL using the NEXT_PUBLIC_REGISTRY_URL environment variable.
HWR Config Example
Here’s an example config for a HWR that connects USDC on Sepolia to Alfajores. You can use Typescript or YAML for your route configs.
{
  tokens: [
    {
      // The ChainName of the token
      chainName: "sepolia",
      // See https://github.com/hyperlane-xyz/hyperlane-monorepo/blob/main/typescript/sdk/src/token/TokenStandard.ts
      standard: TokenStandard.EvmHypCollateral,
      // The token metadata (decimals, symbol, name)
      decimals: 6,
      symbol: "USDC",
      name: "USD Coin",
      // The router address
      addressOrDenom: "YOUR_ROUTER_ADDRESS_1",
      // The address of the underlying collateral token
      collateralAddress: "0x1c7D4B196Cb0C7B01d743Fbc6116a902379C7238",
      // A path to a token logo image
      logoURI: "/logos/usdc.png",
      // The list of tokens this one is connected to
      connections: [{ token: "ethereum|alfajores|YOUR_ROUTER_ADDRESS_2" }],
    },
    {
      chainName: "alfajores",
      standard: TokenStandard.EvmHypSynthetic,
      decimals: 6,
      symbol: "USDC",
      name: "USD Coin",
      addressOrDenom: "YOUR_ROUTER_ADDRESS_2",
      logoURI: "/logos/usdc.png",
      connections: [{ token: "ethereum|alfajores|YOUR_ROUTER_ADDRESS_2" }],
    },
  ];
}
Chain Config Example
Chain metadata can also be configured as needed. These are the same configs as those used with the CLI for any of its deploy or send command (for example, those from the deploy guide).
{
anvil1: {
    chainId: 31337,
    name: 'anvil1',
    displayName: 'Anvil 1 Local',
    nativeToken: { name: 'Ether', symbol: 'ETH', decimals: 18 },
    publicRpcUrls: [{ http: 'http://127.0.0.1:8545' }],
    blocks: {
      confirmations: 1,
      reorgPeriod: 0,
      estimateBlockTime: 10,
    },
    logoURI: '/logo.svg'
  }
}
Deploy the UI
Since the UI is a Next.js app, you can use your favorite hosting service to host it. We recommend Vercel, which works well with Next. AWS Amplify is another popular option.
- Sign up for Vercel
- Create a new project and connect it to your GitHub repo
- Hit Deploy!
And that’s it! Now you and your users can use the UI to send tokens from the collateral chain to remote chains, from one remote chain to another, and from any remote chain back to the collateral chain.
If there is no production relayer running for these chains, you can run a lightweight CLI relayer that delivers only for your HWR in the background with:hyperlane relayer -w TOKEN/chain1-chain2
Return gas
A common problem with token bridges like HWRs is that a user may transfer a token like USDC to a new chain, but only afterwards realize that they do not have the native gas token to move those tokens anywhere including back.
To improve the user experience, you could provide some native gas tokens via a faucet, in addition to UI warnings. To create a faucet, modify the HWR contracts to hold a balance of the native token to share with recipients.
For developers looking to further customize the Warp UI for their own projects
or build their own interchain applications, we encourage you to explore the
Typescript SDK. The SDK contains a growing set of an utilities and
abstractions for interacting with Hyperlane across different protocols (EVM,
Cosmos, Solana).
2. Superbridge
Superbridge is a custom bridge provider, they manage bridge frontends for hundreds of rollups, various tokens and different ecosystems.
Getting a managed Superbridge for your HWR is a hassle-free approach to operating your bridge. A few of their most popular Hyperlane powered bridges are Renzo’s ezETH bridge and Elixir’s deUSD bridge. With a managed bridge instance, Superbridge will handle hosting, theming, upgrades & user support requests for your HWR.
They’ve also built a handy feature that allows for self-service testing of recently deployed HWRs.
Testing your HWR
- Navigate to the Superbridge Hyperlane Playground
- Click the settings cog and then click Customize
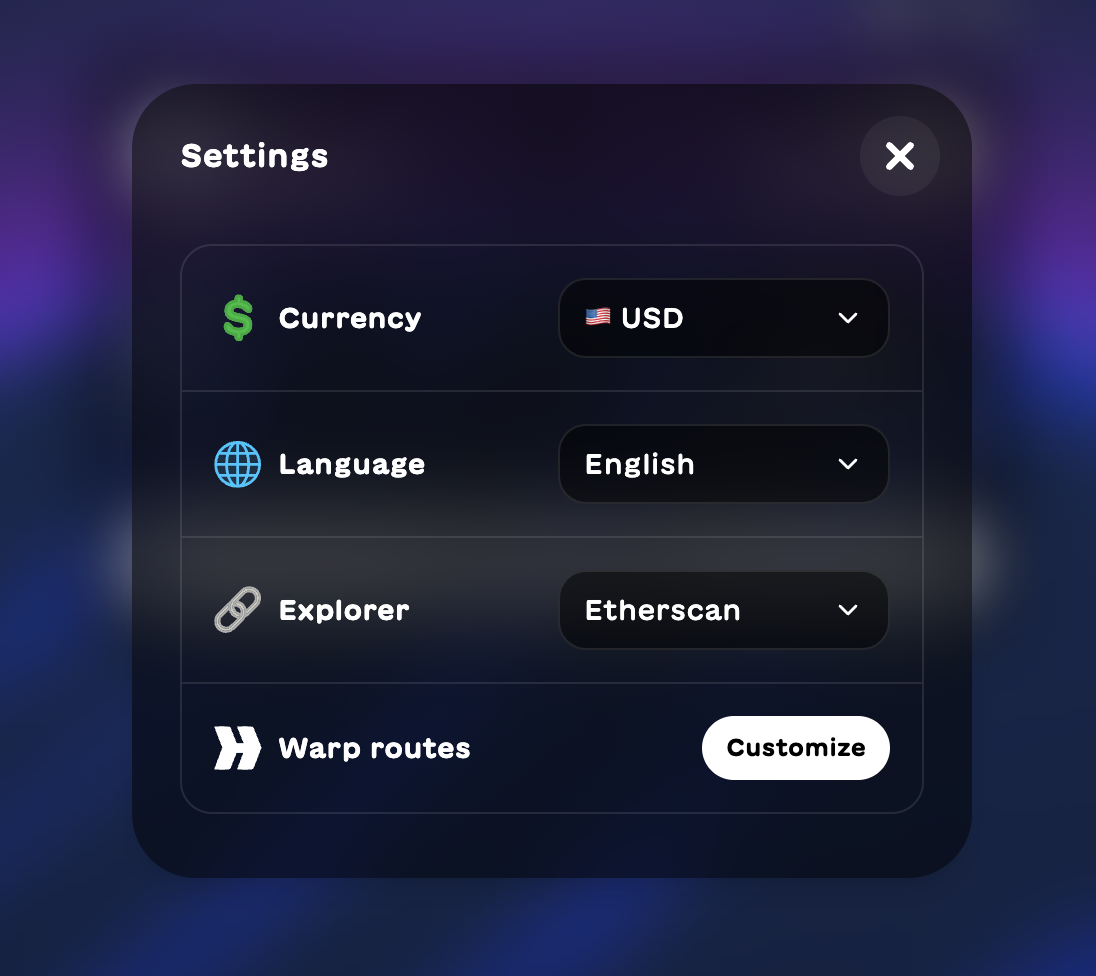
- Paste in the YAML file you generated when deploying your HWRs
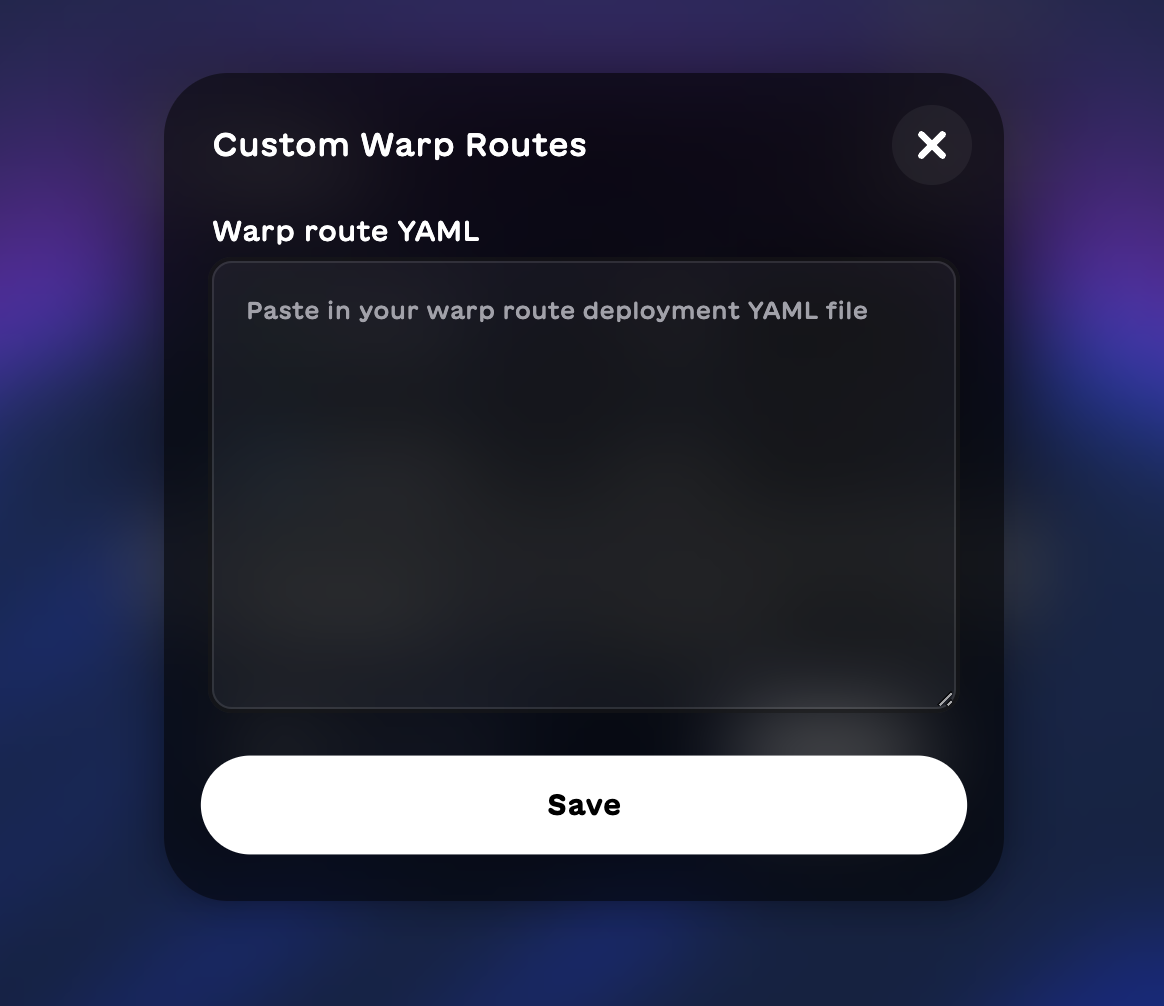
- The specified tokens and networks will now be available for bridging.
If any tokens or networks are missing after you’ve pasted in the YAML file,
it’s possible Superbridge doesn’t support Hyperlane on this network just yet.
Reach out to Superbridge to see what the
timeline is for adding support. Go to Production
To bring your HWR to production with Superbridge, reach out to the Superbridge team. They can typically get a frontend up and running in about a day.